My son Levi is a sponsored Pro rider with Endless Biking, Rocky Mountain Bikes, Fox, Shimano and several other companies and is currently in Chile South America preparing for the first race in the Enduro World Series (EWS). Levi and his teammate Anthony will be Farellones Chile high up in the Andes in the next few days to get used to the altitude and prepare for their first EWS race of the season. They then head up to Manizales Columbia where the second EWS race will not only take them through the mountains but also through parts of the city.
The hard work and perseverance that comes from years of dedication and preparation are starting to pay off. The authentic learning experiences that Levi grew up with have prepared him to take on these intense challenges and I can only imagine what this and his future adventures will bring and what lessons will be learned.
The video should give you a relatively good overview of the DIY Teleprompter and how it can be used. The following pictures and brief explanations are intended to augment the video and give you an idea of how you can construct a similar teleprompter. I must warn you that I am not offering a detailed recipe or plan for building your own teleprompter. Why? Over the years I have found that the more detailed plans are the more frustrating they can be when they leave out that key bit of information. I don’t want to frustrate you so I am keeping the instructions general. In addition, I can’t recall a time when I didn’t modify someone else’s plan to fit my unique circumstances. I watched several DIY teleprompter videos and would not recommend any of them individually but I managed to glean bits of information from a variety of different videos. I suggest that after you watch this video and review this page you may want to watch some additional videos on YouTube to make the teleprompter your own.
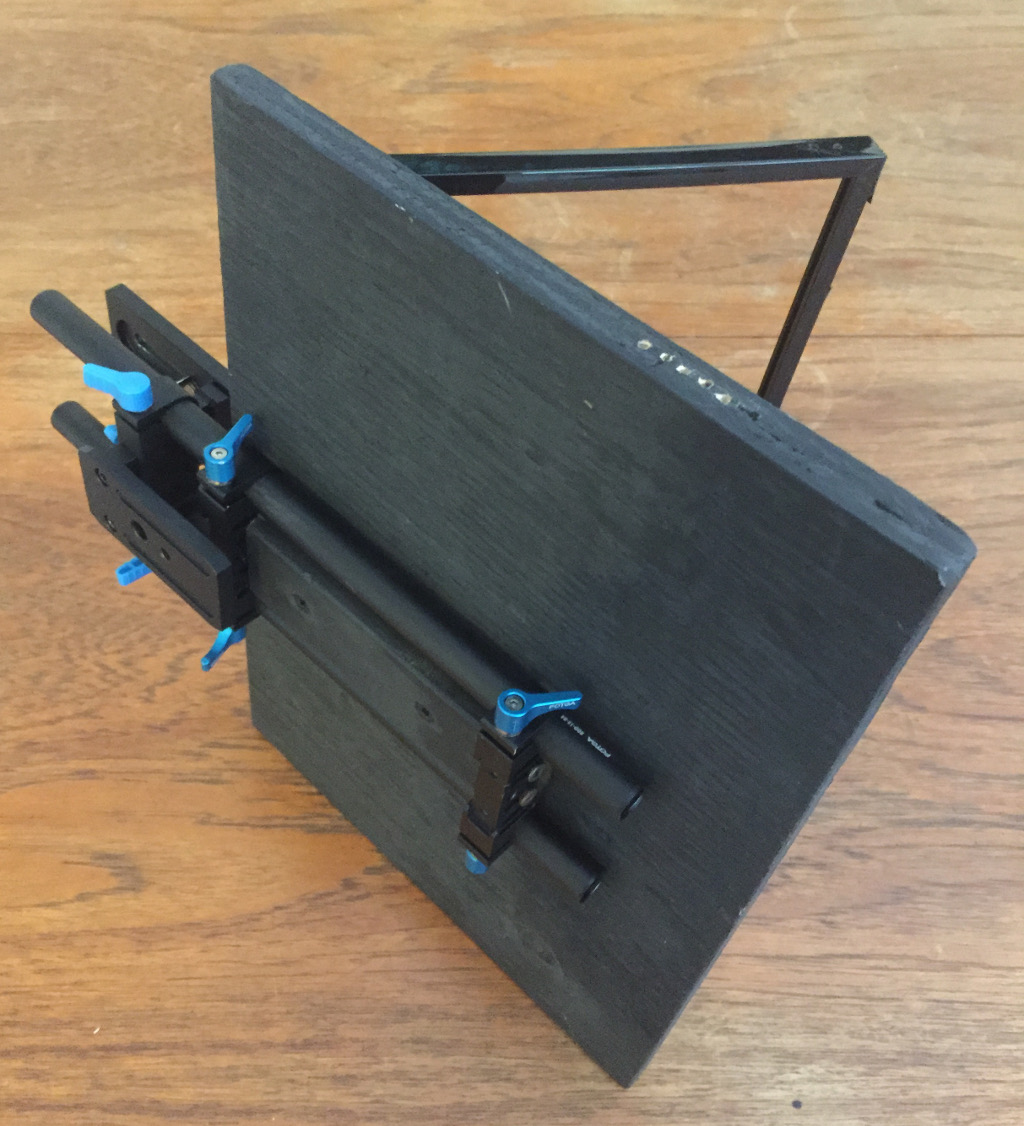
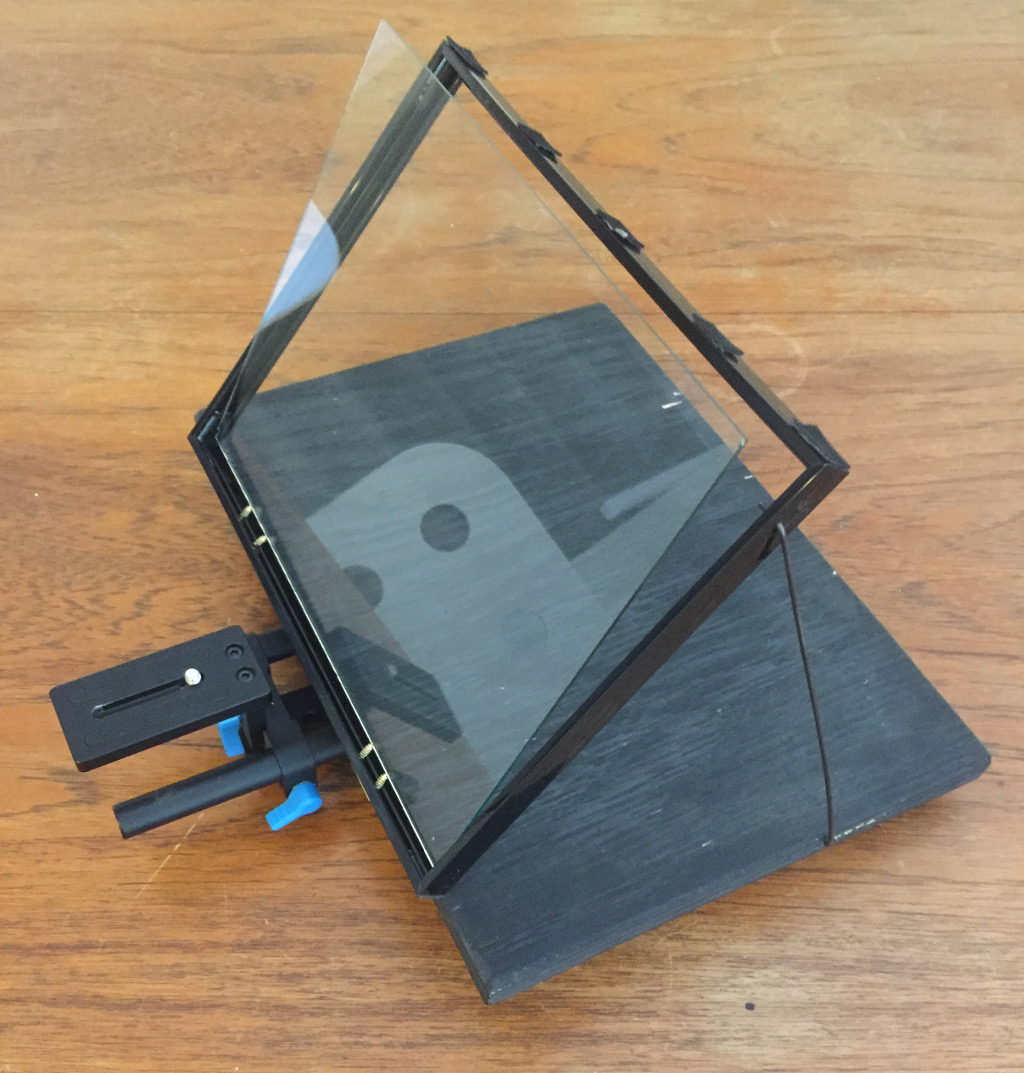
The teleprompter base is a piece of 1/2 plywood cut to be a bit larger than the 8X10 plastic picture frame which is used to hold the glass. These two parts are connected with a couple simple hinges and the whole assembly is attached to a standard type DSLR rail system
The multiple small holes allow me to adjust the angle of the Teleprompter screen.
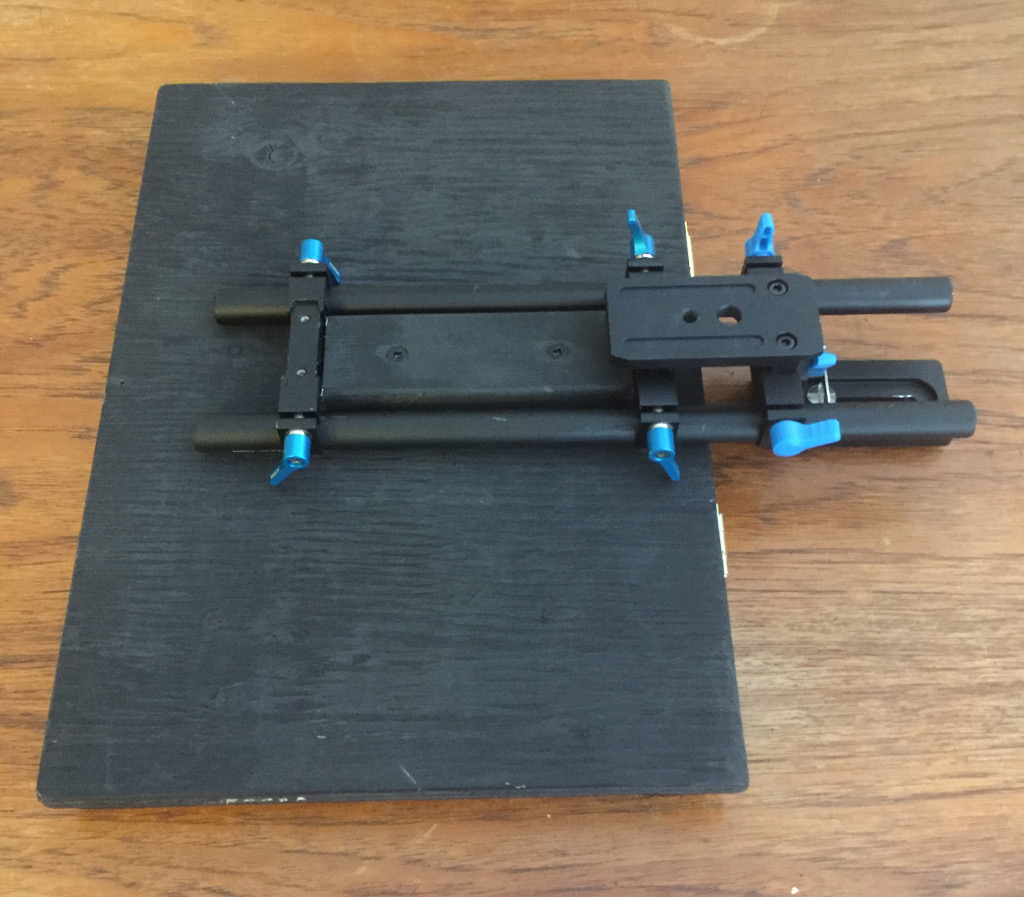
There are many different types of rail systems available and since I wanted to have my camera connected to the teleprompter I needed a system that could allow me to mount the camera to the teleprompter and then mount the whole teleprompter to the tripod. How you connect the rail system to your teleprompter base will depend on the type or style of clamps and rails you purchase and how you intend to fasten the rail system to the base.
Because I wasn’t able to exactly what I was looking for at a reasonable cost I purchased the rod support baseplate, the rails, and the rail clamps separately. When you use a standard DSLR 15mm rail and rod system you can easily mix and match the components. Since the rails that came with the baseplate were not really long enough to handle the weight of the 1/2 inch plywood teleprompter platform, I simply ordered longer 15mm rails. There are so many different types of baseplates, rails, and clamps that you will be able to find what you need to secure the rail system to the teleprompter base if you are willing to experiment.
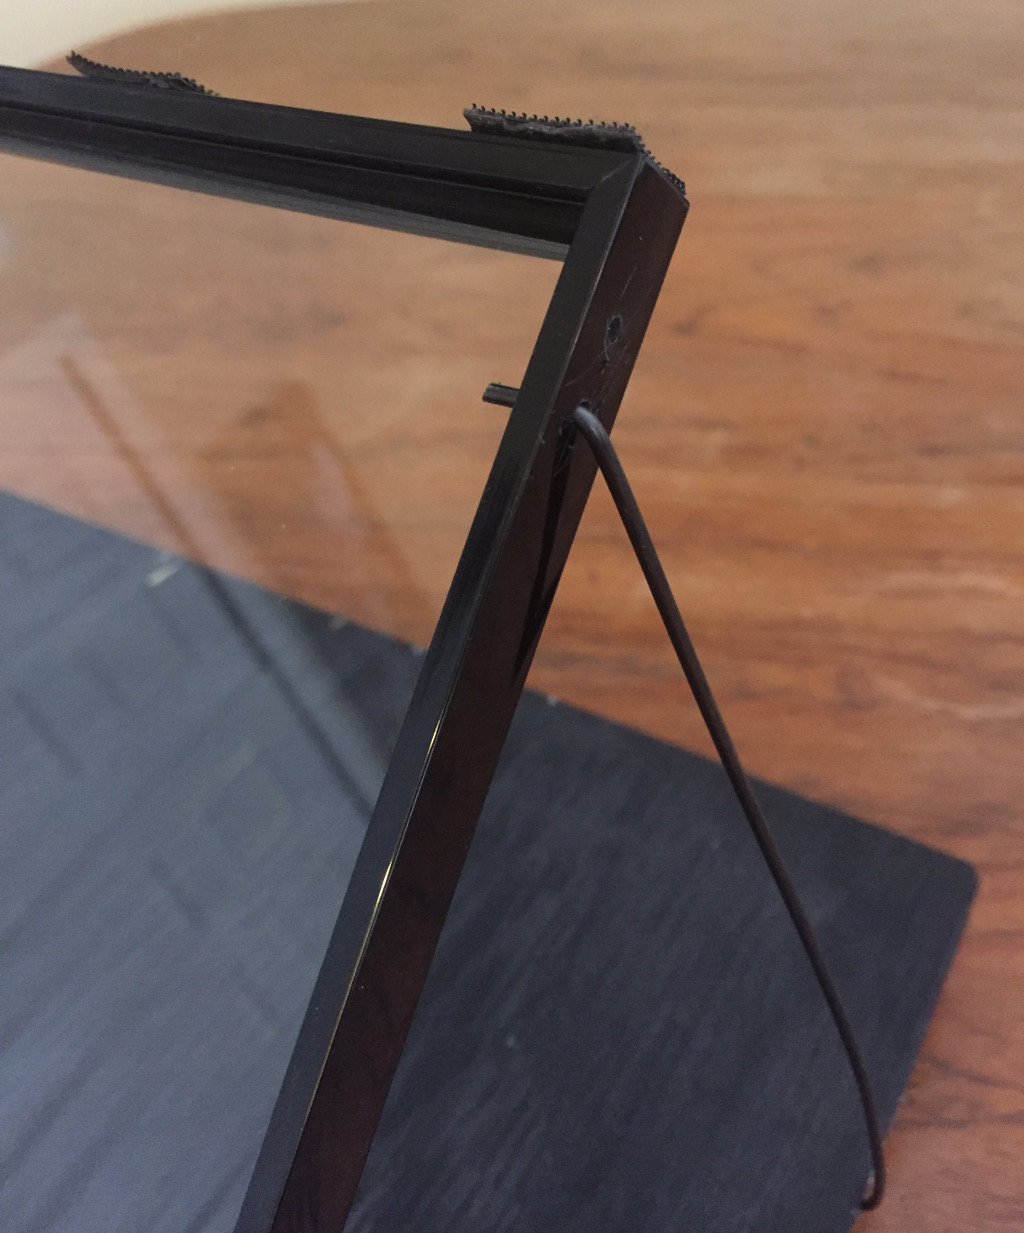
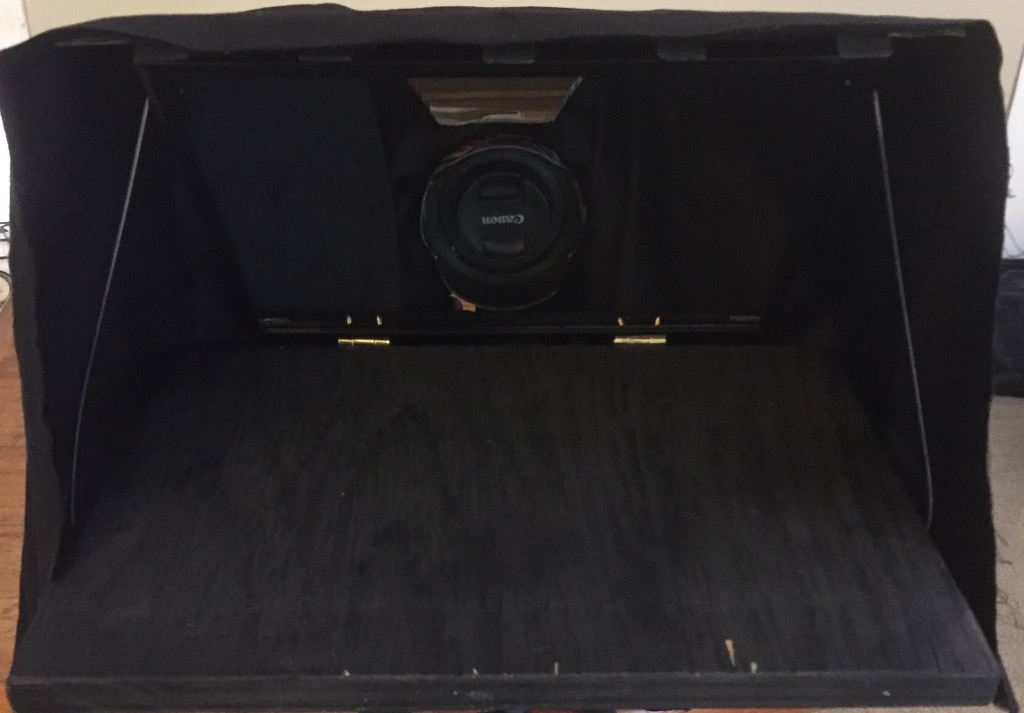
From this view, you can see the portion of the rail system that the camera will be attached to, the plastic picture frame, the velcro tabs for securing the black dark out cloth, and the spokes which form the support for the picture frame. Please note that there are several holes drilled into the base that allows for adjustment of the frame.
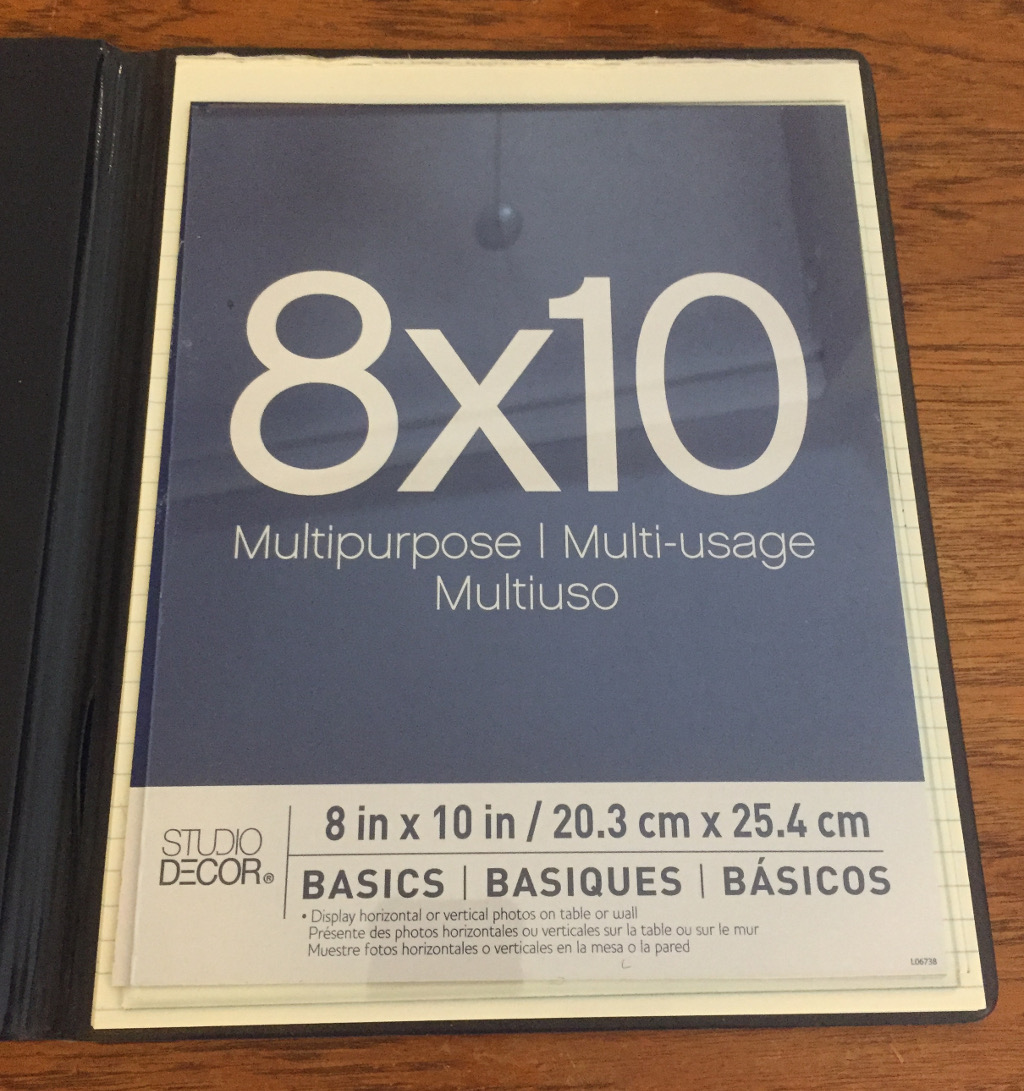
I store the glass when it isn’t on the teleprompter in an old letter sized folio.
In order for the teleprompter to work you need a piece of glass that will act as the reflector. Fortunately, you can still get an 8X10 picture frame at Michaels for approximately $10 that uses glass. Be careful, many picture frames are now coming with plastic which is not reflective enough and will not work properly.
The bent spokes that are used to support the picture frame will also hold the glass in place – assuming you drill the holes in the right place. Similarly, if you position your hinges in the right place the screws on the hinges can act as stops to prevent the glass from slipping out.
The standard base will accept any DLSR or other cameras with a standard 1/inch connector. If the glass is clean you barely tell that it is even there. The whole teleprompter and camera fit nicely on the Manfrotto tripod with the Fluid pan head.
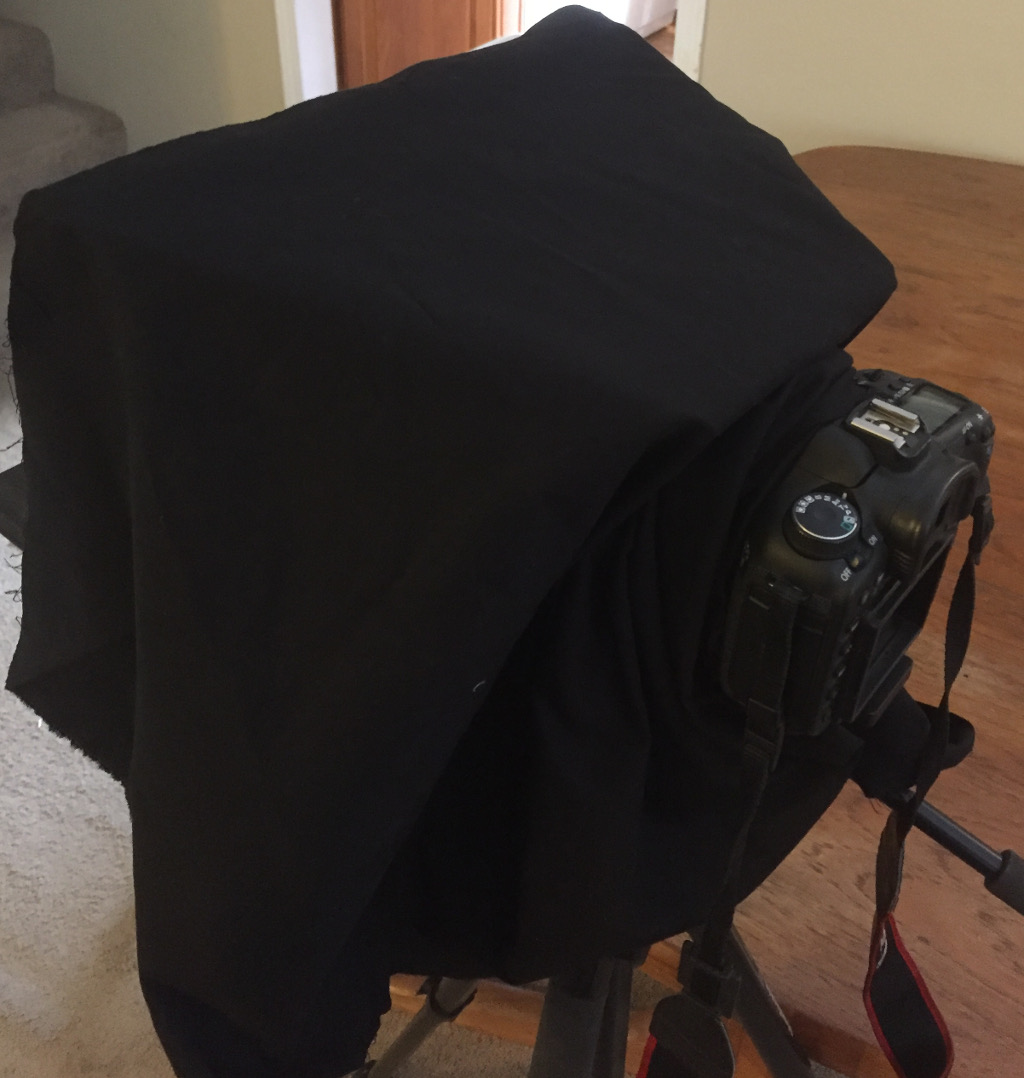
A simple piece of cardboard cut into a triangle and folded towards one end is just enough to keep the blackout cloth off the camera lens.
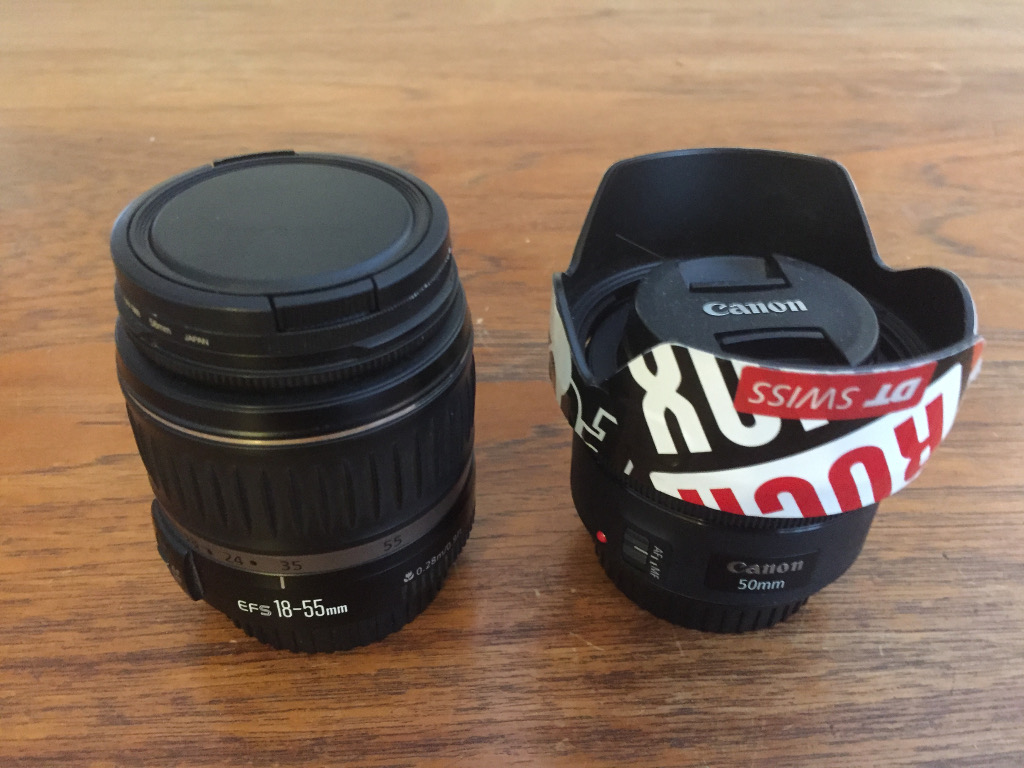
The fixed focal length 50MM lens is much sharper than the stock wide-angle to standard 18-55MM lens. If you don’t have a standard lens then the stock zoom lens that comes on most camera kits will work fine.
With a few small pieces of velcro, you can fasten a blackout cloth to the top of the teleprompter frame and then wrap the remainder of the cloth around the lens exposing enough of the camera body to use all the controls.
The lens is positioned so that you are looking directly at it when you are reading the words off the teleprompter.
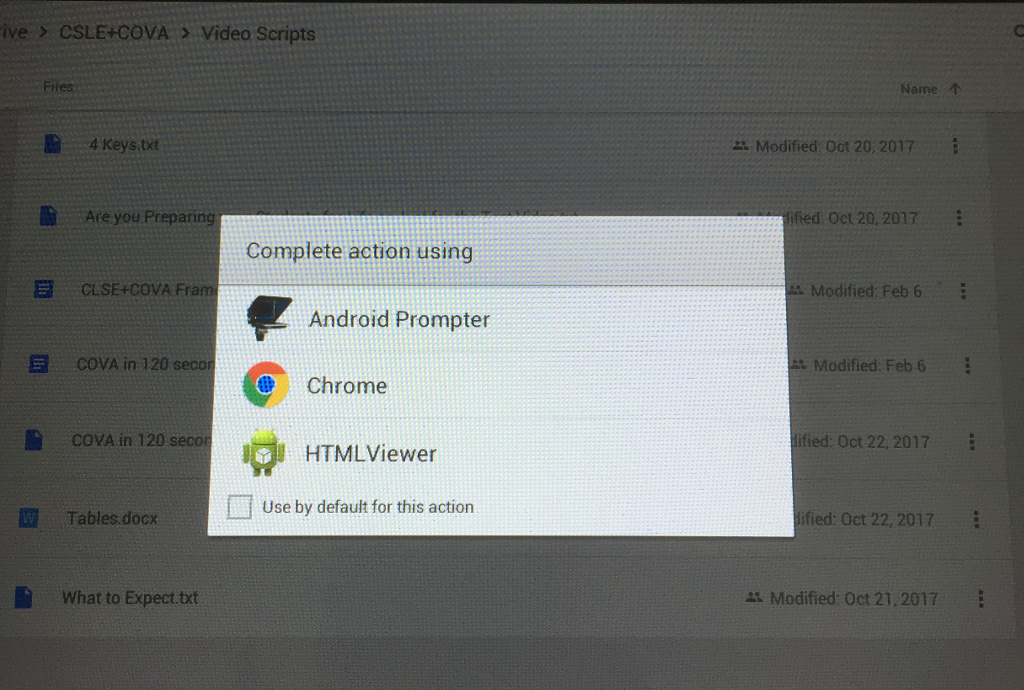
I am using Android Prompter because it is free and I happen to have an old Android tablet that is too old to use for anything else. I still haven’t found a fully functional free iPad prompter piece of software so I will be sticking with the Android Prompter software for now.
You will need to adjust Teleprompter software to the right size that you can read and also run at the right speed so that you aren’t talking too fast or too slow. This will require some experimentation to get the size of text and speed of the scroll just right.
When you factor in the hinges, paint, cloth, velcro and all the rail system components I spent less than $75 dollars which is a lot less than the $400+ that you can spend on entry-level commercial systems and have fewer features.
Whether you are creating a digital story to establish a conceptual hook, a step by step instructional video, a video introduction to an online module, or a video for blended learning it has never been easier to do it yourself (DIY).
To help you understand what is involved in creating videos I will:
Provide a few video examples
Identify the tools and resources I used to create, edit and publish those videos
Share the full list of hardware, software and videos resources (including links) that I use on a regular basis and that you can use as a starting point to create effective videos for your learning environments.
Digital Story Telling
Not Suited for School But Suited For Learning
Video Input/Capture: iMovie Video Editing: iMovie Image Editing: Photoshop Audio: Audacity Mic: Blue Yeti Publishing: Youtube
Establishing a Conceptual Hook
Connecting the Dots vs Collecting the Dots
Video Input/Capture:Canon 7D Video Editing: iMovie Image Editing: Photoshop Audio: RODE Rec (iPhone App) Mic: RODE smartLav+ Teleprompter: DIY & A Prompter for Android (Android App) Lights: 3 point lighting setup with Cowboy Studio Light Kit & Clamp Lights Background: 9′ White studio Publishing: Youtube
Module Introduction Video
EDLD 5305 Disruptive Innovation Introduction
Video Input/Capture: Canon 7D Video Editing: iMovie Image Editing: Photoshop Audio: RODE Rec (iPhone App) Mic: RODE smartLav+ Teleprompter: DIY & A Prompter for Android (Android App) Lights: 3 point lighting setup with Cowboy Studio Light Kit & Clamp Lights Background: 9′ White studio Publishing: Youtube
Video for Blended Learning Scenario
Creating Significant Learning Environments (CLSE)
Video Input/Capture: Camtasia Video Editing: Camtasia Slides: Keynote Image Editing: Photoshop Audio: Camtasia Mic: Blue Yeti Publishing: Youtube
Dwayne’s DIY Video Creation Toolbox
I currently use or have used the following tools and have linked to where the tool can be acquired. Wherever possible I will link to a comparable free tool:






 (Mac) or
  (PC)
(PC) &
& 


